
Executing a true Level 5 drywall finish requires strict material preparation, skilled tool handling, and precise job site inspection. As defined by the Gypsum Association (GA-214), Level 5 involves applying a full-surface skim coat over a complete Level 4 substrate to conceal variations in texture and absorption between gypsum board paper and joint compound.
In high-end residential builds and commercial developments across British Columbia, achieving seamless smooth walls requires going beyond basic drywall taping. Below are essential expert tips to ensure flawless execution on your next Level 5 project.
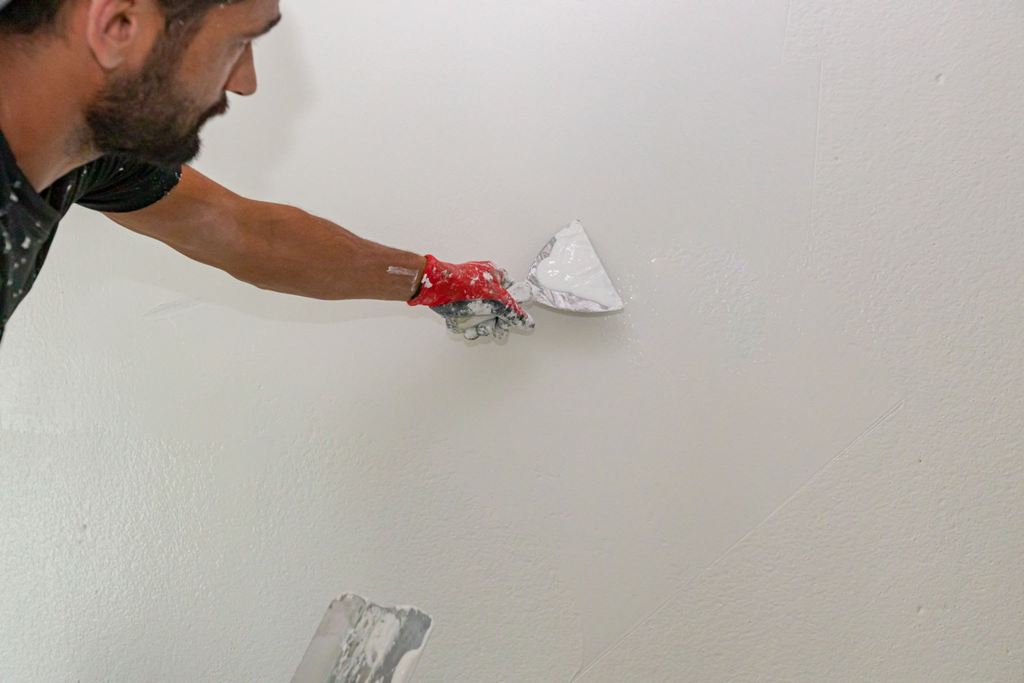
Skim coat application across wall surface. Source: roman023 / Getty Images
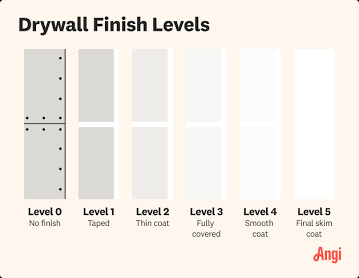
Comparison of GA-214 drywall finish levels. Source: Angie’s List / The 6 Drywall Finish Levels: A Complete Guide | Angi
1. Perfect the Level 4 Base First
A common mistake in drywall finishing is assuming a skim coat will hide underlying structural or taping imperfections. A Level 5 finish is only as flat as the Level 4 foundation beneath it.
- Feather Out All Joints: Ensure butt joints and recessed factory edges are feathered out widely using standard 10-inch and 12-inch taping knives.
- Inspect for Ridges: Before skim coating, pole sand the Level 4 base lightly to remove knife marks, high spots, or tool ridges.
- Wipe Down Dust: Remove all fine gypsum dust from the wall surface using a damp microfiber cloth or vacuum attachment. Remaining dust prevents the skim coat compound from adhering properly to the paper face.
2. Thin the Compound to the Right Consistency
Applying joint compound straight out of the bucket creates drag, air bubbles, and uneven thickness. Proper consistency is critical whether applying by hand, paint roller, or airless spray equipment.
- Thinning Ratios: Mix lightweight or topping joint compound with clean water until it reaches a thick, creamy, pourable consistency (similar to heavy pancake batter).
- Eliminate Air Bubbles: Mix compound thoroughly at low speeds using a mud paddle to prevent whipping excess air into the mixture. Adding a small drop of dish soap or specialized compound additive can help reduce surface pockmarks (pitted air bubbles) during application.
3. Master the Application Techniques
Depending on square footage and project scale, finishing crews use two primary application methods for Level 5 skim coating:
Method A: Roller and Smoothing Blade (Ideal for Renovations & Targeted Areas)
- Roll On: Use a heavy-nap (3/4-inch) paint roller to roll thinned compound evenly onto the wall surface in 4×4-foot sections.
- Wipe Off: Immediately follow behind with a wide stainless steel smoothing blade or skimming knife (typically 24 to 32 inches wide). Hold the blade at a shallow 15-to-20-degree angle, pulling smoothly to strip away excess material while leaving a microscopic film filling all paper pores.
Method B: Airless Spray Application (Best for Large Commercial Builds)
- Spray On: Utilize an airless paint sprayer equipped with a large spray tip (e.g., 0.027 to 0.031) to atomize specialized Level 5 spray-surfacer compound evenly across entire wall planes.
- Back-Wipe or Self-Level: Some commercial spray-surfacers self-level effectively, while traditional compounds require immediate back-wiping with a wide skimming blade to tight tolerance.
4. Utilize Critical Grazing Light During Final Sanding
Standard overhead construction lighting masks surface defects that become obvious once final high-gloss paints or wall-wash lighting fixtures are installed.
- Set Up Low-Angle Lighting: Position a high-lumen halogen or LED work light parallel to the wall surface (grazing light). This casts long shadows across microscopic ridges, pinholes, or uneven areas.
- Fine-Grit Sanding: Sand the dried skim coat using fine-grit sandpaper (220-grit or finer) or fine sanding pads. Avoid aggressive pressing, which can cut through the thin skim layer back down to bare paper.
5. Apply a Quality High-Build Drywall Primer
The final step in securing a Level 5 finish occurs before paint application.
- Equalize Porosity: Although a skim coat covers bare paper, a high-quality high-build PVA drywall primer-sealer seals the entire compound layer evenly, preventing uneven sheen absorption in topcoat paints.
- Light Sand Between Coats: Perform a quick knock-down sand after priming to catch any remaining surface fibers before applying flat, satin, or high-gloss paint sheens.
Key Technical Checklist for Level 5 Execution
| Finishing Stage | Recommended Tool / Material | Critical Quality Metric |
| Base Preparation | 12″ Taping Knife / 120-Grit Sandpaper | Flat Level 4 seams with zero tool ridges |
| Compound Mixing | Topping Compound + Low-Speed Mixer | Creamy consistency, zero pockmarks or air bubbles |
| Skim Application | 24″–32″ Skimming Blade / Airless Sprayer | Uniform microscopic film covering 100% of surface |
| Quality Control | Low-Angle LED Grazing Light + 220-Grit Pad | Flawless surface under grazing side-light inspection |
Professional Framing, Drywall, and Wall Finishing Services
Division9 Contractors Ltd specializes in precision Level 4 and Level 5 drywall finishing, light gauge steel stud framing, acoustical assemblies, T-Bar ceilings, and interior painting. We partner with commercial general contractors, interior designers, and custom builders to deliver smooth, paint-ready interior wall surfaces.
We serve commercial, industrial, institutional, and residential projects across Surrey, Vancouver, Burnaby, Richmond, Langley, Coquitlam, Abbotsford, Delta, Maple Ridge, New Westminster, North Vancouver, West Vancouver, Squamish, Whistler, and Chilliwack.